
By Nickie Hayes
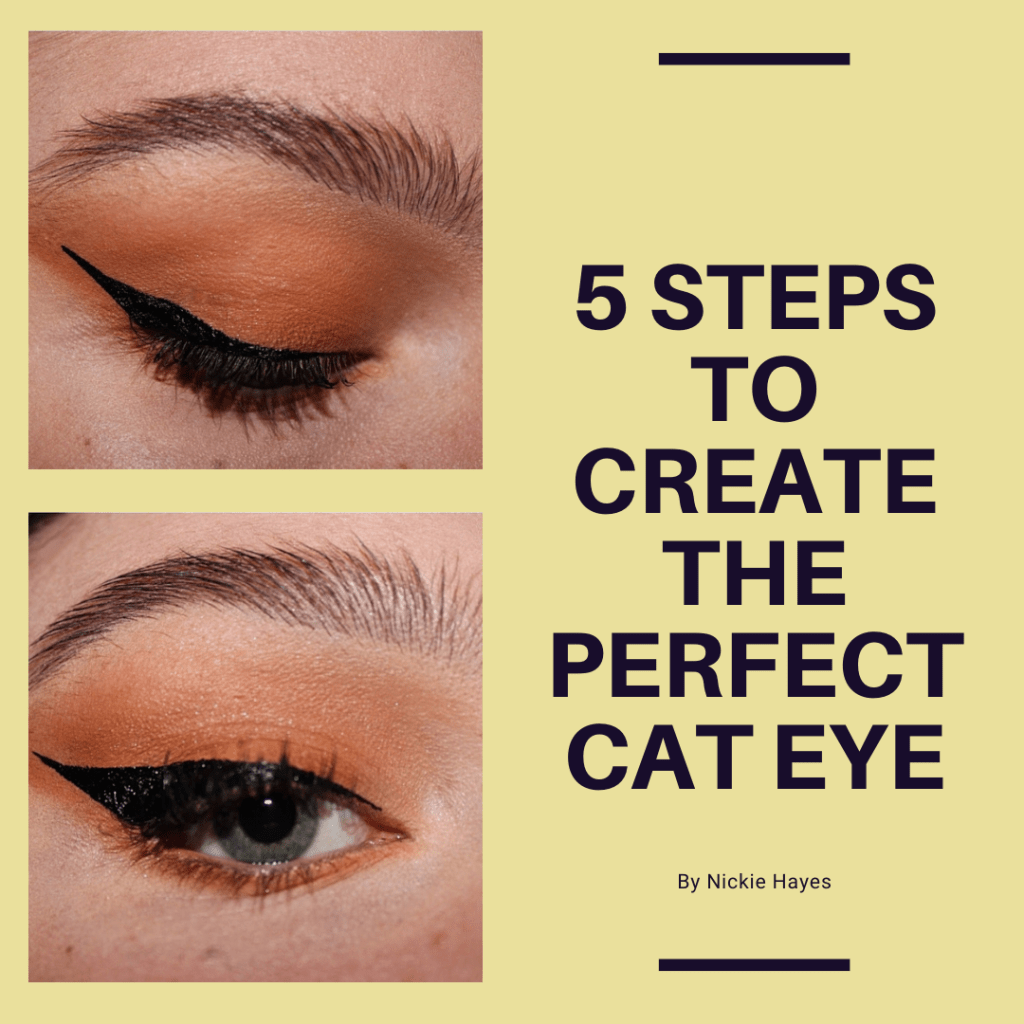
In my experience with makeup, the eye look that gives people the most trouble is the perfect cat eye or winged liner. Whatever you call the look, it can be extremely difficult to create if you do not have any guidance. However, with practice, it can be done. There are also a lot of questions that go along with creating the eye look, but each step I have laid out should cover them. With that being said, let’s get started.
Step 1: Create a Base
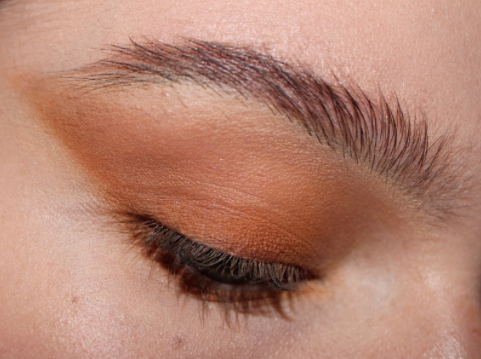
To start this look, you should start with a base layer. The base will help anything you put on top of it stick better and thus, last longer. For me, this included using a concealer as a primer for the eye, and a simple eyeshadow look. The concealer I used was the Youthful Glow Concealer With Hyaluronic Acid by Ulta Beauty in the color “Fair Neutral,” and the eyeshadow palette I used was The Chocolates by Juvia’s Place. I wanted the eyeliner to stand out, so I opted for neutral eye shadow. However, a winged eyeliner can still look impressive with many different eyeshadow colors and styles. As well, the eyeshadow shape I created will help in the next step.
Step 2: Creating the First Line

For the next step, I utilized the eyeshadow shape I created. Creating the eyeshadow look in this manner allowed me to have a guideline for creating the first line or the structure of the cat eye. It is a fantastic way to aid in creating the perfect wing. For the eyeliner, I used the NYX Professional Makeup Vinyl Liquid Liner in the color “Black”. I personally prefer a liquid liner because the brush is more flexible. However, I would suggest starting with a felt tip eyeliner because the applicator is more forgiving, as it has more structure. Gel eyeliner will definitely work as well, but I feel it is the most difficult way to apply a cat eye. You need a very small angled brush to apply the liner with precision and they can be hard to find for an inexpensive price. As well, I chose the color black because I like a bold style, but a brown liquid liner would create a softer eye look.
To create the line, start at the outer corner of the eye. As you can see from the picture, the line I created, if it was continued, would connect to the end of the tail of my eyebrow. Using the tail of the brow as a guide for creating the line will also help create the most flattering wing for your eye shape. However, if you have hooded eyes, where there is a fold of skin that partially covers the lid, I would suggest angling the line outwards more. That way the wing does not fall within the skinfold.
Step 3: Draw a Line Across the Eyelid

When drawing the line across the lid, it is better to start thinner rather than thicker. You can always add more eyeliner, but it will be much harder to take off, especially if you have already created a beautiful eyeshadow look underneath. For me, I do not have that much eyelid space on the inner corner of my eye because of skinfolds and wrinkles. Therefore, I like to draw my line stopping before I reach the inner corner of my eye. If I bring it in farther, it tends to draw my eye shape downward. If your eye shape is not like mine, continue this line to the inner corner. As well, make sure to connect this line to the first one created.
Step 4: Connecting the Lines

The next step is where it may become slightly tricky, but do not lose hope, makeup can always be taken off and reapplied. As you can see from the picture, I drew a line to connect the lines from steps two and three. I prefer to draw the connective line from the line created in step two. Also, I will usually start with less product on the liquid eyeliner applicator because the first line I created is so thin. Then, I will drag the connecting line down towards the outer third of the eyelid, starting from the middle of the first line created. As well, this line will be perfected in the last step, so it does not have to be flawless. Although again, I would suggest keeping this line as thin as possible.
Step 5: Perfecting and Thickening the Wing

The fifth step is meant to perfect the base lines we have laid out. All that I have done from the last photo to this photo is essentially thickened and smoothed the connective line I made in step four. I like to have an extremely thick winged eyeliner and that is what I have created here. If you do not want to have a wing this dramatic, make the line from step one not as long as I did, and the connecting line thinner than I did. As well, if you do not want to see the skin from the upper water line, fill it in with a waxy pencil eyeliner. In my everyday life, I do not feel like this is necessary, but for special occasions, I will do the extra step. The fifth step, from my experience, is the one that takes the longest. As a perfectionist, I used to take forever on this step, but I learned little imperfections are okay. This wing is not perfect, but it is almost there. Repeat these steps on the other eye to finish the sultry eye makeup look.
Overall, do not get discouraged or be too hard on yourself. Makeup is truly an art form, and creating a masterpiece does not usually happen on the first try. If you keep practicing, you will find the cat eye that fits you perfectly.

Leave a comment